-
All Departments
-
Shop by Category
 ElectronicsCategory Electronics description. Lorem Ipsum is simply dummy text of the printing and typesetting industry...
FashionCategory Fashion description. Lorem Ipsum is simply dummy text of the printing and typesetting industry...
AccessoriesCategory Accessories description. Lorem Ipsum is simply dummy text of the printing and typesetting industry...
Health & BeautyCategory Health & Beauty description. Lorem Ipsum is simply dummy text of the printing and typesetting industry...
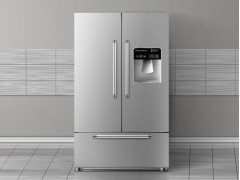
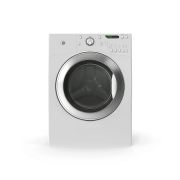
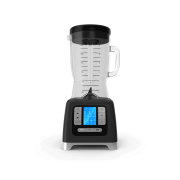
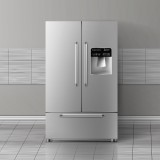
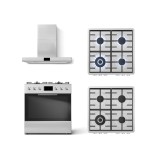
Home & FurnitureCategory Home & Furniture description. Lorem Ipsum is simply dummy text of the printing and typesetting industry...
Sports & OutdoorCategory Sports & Outdoor description. Lorem Ipsum is simply dummy text of the printing and typesetting industry...
Toys & GamesCategory Toys & Games description. Lorem Ipsum is simply dummy text of the printing and typesetting industry...No items available.
Lawn & GardenCategory Lawn & Garden description. Lorem Ipsum is simply dummy text of the printing and typesetting industry...No items available.
ConstructionCategory Construction description. Lorem Ipsum is simply dummy text of the printing and typesetting industry...No items available.
SupermarketCategory Supermarket description. Lorem Ipsum is simply dummy text of the printing and typesetting industry...
ElectronicsCategory Electronics description. Lorem Ipsum is simply dummy text of the printing and typesetting industry...
FashionCategory Fashion description. Lorem Ipsum is simply dummy text of the printing and typesetting industry...
AccessoriesCategory Accessories description. Lorem Ipsum is simply dummy text of the printing and typesetting industry...
Health & BeautyCategory Health & Beauty description. Lorem Ipsum is simply dummy text of the printing and typesetting industry...
Home & FurnitureCategory Home & Furniture description. Lorem Ipsum is simply dummy text of the printing and typesetting industry...
Sports & OutdoorCategory Sports & Outdoor description. Lorem Ipsum is simply dummy text of the printing and typesetting industry...
Toys & GamesCategory Toys & Games description. Lorem Ipsum is simply dummy text of the printing and typesetting industry...No items available.
Lawn & GardenCategory Lawn & Garden description. Lorem Ipsum is simply dummy text of the printing and typesetting industry...No items available.
ConstructionCategory Construction description. Lorem Ipsum is simply dummy text of the printing and typesetting industry...No items available.
SupermarketCategory Supermarket description. Lorem Ipsum is simply dummy text of the printing and typesetting industry... -
Mega Menu
-
Shop by Category
-
Mega Menu
-
Demos
- SALE